

The Firewall Fix We Should’ve Done 20 Years Ago. This Simple Kit Is Just What The Doctor Ordered.
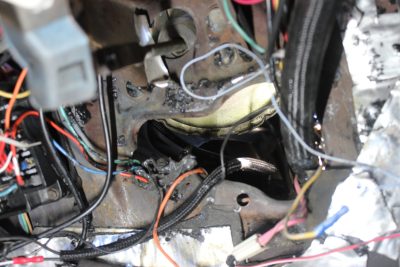
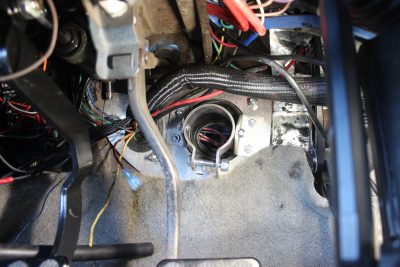
Have you ever put off a project for 20 years? We did with our 1966 Chevelle. You see, the hole in the firewall where the steering column goes through wasn’t sealed up. We tried duct tape, cardboard, sound deadener, silicone caulking, and whatever else to half-ass patch the hole. There was no good way to get in there to get it sealed up.
The 20-Year Solution
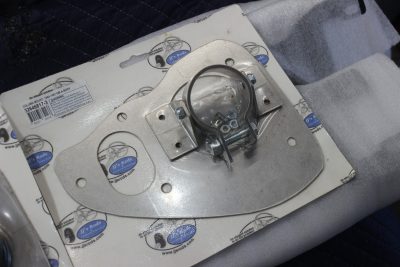
About a year ago we picked up these slick firewall plates from JJ’s Rods, which is owned by Borgeson. These plates are designed for specific applications and include the rubber boots and all the hardware. Pretty straight forward right? We knew that it was going to require removing the steering column and getting under the dash, so we procrastinated another year. What’s one more year when you’ve waited 20, right?


Remove Before Install
Our first step for installation was to remove the steering column. Before we even did that we removed the drivers seat to give us more room under the dash, but this isn’t necessarily required. With the seat and the column out of the way, we actually removed the clutch and brake pedals but that was because we were going to redo the clutch master cylinder at the same time.
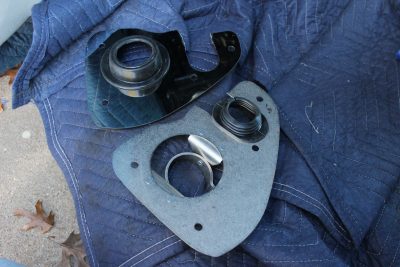
These plates can be ordered with a boot for clutch linkage or without. We ordered with, and figured we can use that hole and boot to route wires and such through. Seeing that we already had all sorts of engine wiring for our Holley EFI going through, we were going to have to modify the plates a bit to make it all work.
Slight Modification
What we ended up doing was cutting the top section off the clutch boot area that gave us a nice slot to slide all the wires into. This saved us from having to redo hours and hours of wiring. At this point we trimmed up the boots as well. For the column, we made the hole in it 1/8th-inch smaller than the column. For the wiring side, we cut a slot in it so we could slide all the wiring into it.
With the plate modified so it would fit, we held it up into place to mark the mounting holes we needed to drill. At this point we realized JJ’s Rods was really smart and they actually designed it to use the factory holes in the firewall. A couple of them had to be drilled out, but the initial hole is already there making this step super easy. Before installing the plates we installed the rubber seal around the perimeter of the plate on the firewall side.
Team Work
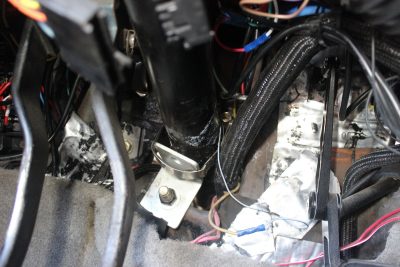
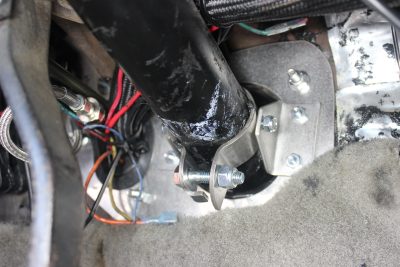
At this point you’ll need a second set of hands. One person under the hood, and one under the dash. We held the plates in place, and fished the provided hardware through the holes and firewall. Tightening them down we see this allows the plates to form against the firewall and seal it up nicely.
Our last steps were to tidy up wiring, install the pedals, steering column, and seat. That was it! This isn’t a hard job, just one that takes some time to do. We’d say this is a one day, or a weekend job. Now when we cruise we don’t have hot air blowing on us, which will be great in the summer. Plus there’s the added safety where if there is an issue with the motor and it catches fire, that fire won’t come through the firewall directly onto us.

To check out all the different plates available, hop on Borgeson.com!
The post The Firewall Fix We Should’ve Done 20 Years Ago. This Simple Kit Is Just What The Doctor Ordered. appeared first on BangShift.com.


